We recently had the need to reconfigure our material roll rack storage. The rack we had been using was an awkwardly shaped metal one with legs that proatruded too far forward. It was also double sided and, as it had to be positioned against a wall, it was difficult to access materials on the back rack.
I decided to design and build a new rack out of wood, as it is readily available in a variety of sizes and lengths from most hardware chains. Our supplier has an online catalogue so I was able to work out what timber I needed by doing all the design work on SketchUp (a free 3D modelling software package).
I initially built only one, but the Conservation team liked it so much they requested a second one! The materials for two units came to about $350. We already had the necessary tools and workspace available which made the job of construction easier.
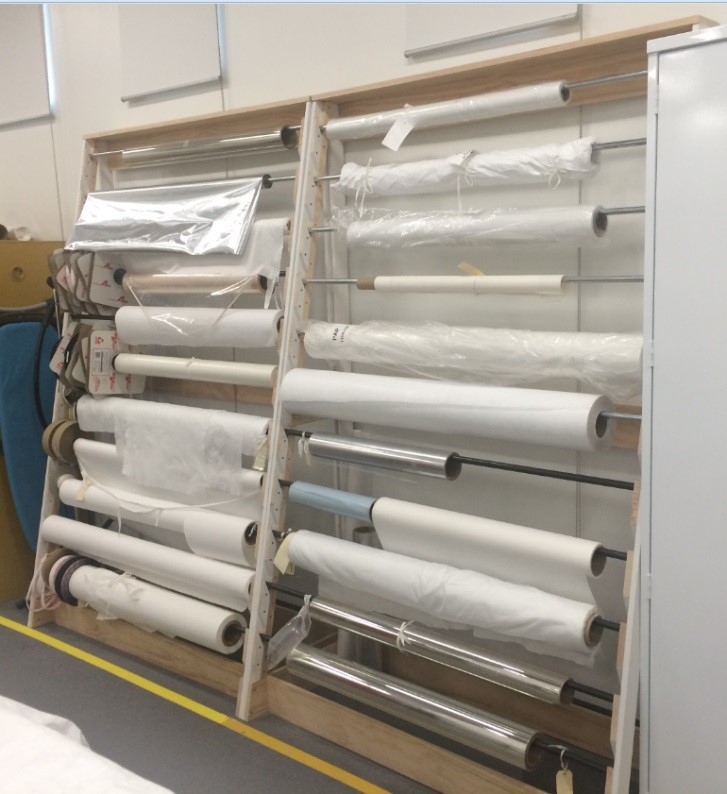
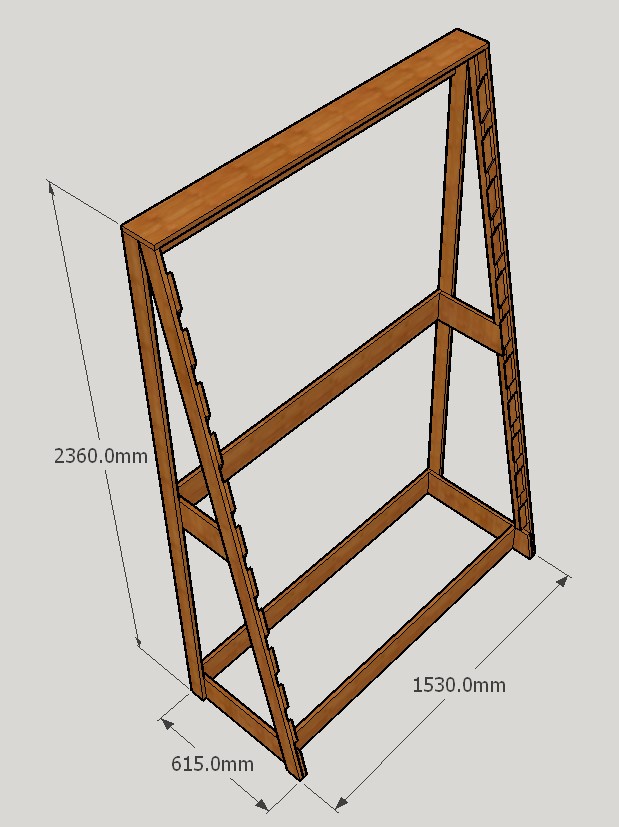
I thought others might be interested in building something similar, so here is how they are made:
Materials used (approx.)
- 67mm x 18mm pine for A-frame and angled pieces (7 x 2700mm lengths)
- 30mm x 18mm pine to sit behind the angled pieces (2 x 2700mm lengths)
- 140mm x 19mm* pine for cross pieces of the frame (7 x 1800mm lengths) *(the 140mm pine only came in 19mm thickness)
- 19mm x 1400mm metal rods (the rods come in 3 metre lengths).
- 8-10 x 30mm Phillips Head screws – approx. 150 of.
- Tools – drop saw, cordless drill, 4mm drill bit, Phillips Head bit, hacksaw, tape measure, carpenters square, etc.
The design
The overall dimensions of the rack were determined by the space we had available (see below) and the length of the rolls we needed to accommodate – these may need to be adjusted for your own situation. The triangular sloping design means more weight is placed at the base of the rack, making it more stable. Metal rods for the rolls fit into slots formed by angled pieces of wood, meeting our requirement that rolls could easily be lifted in and out of the rack.
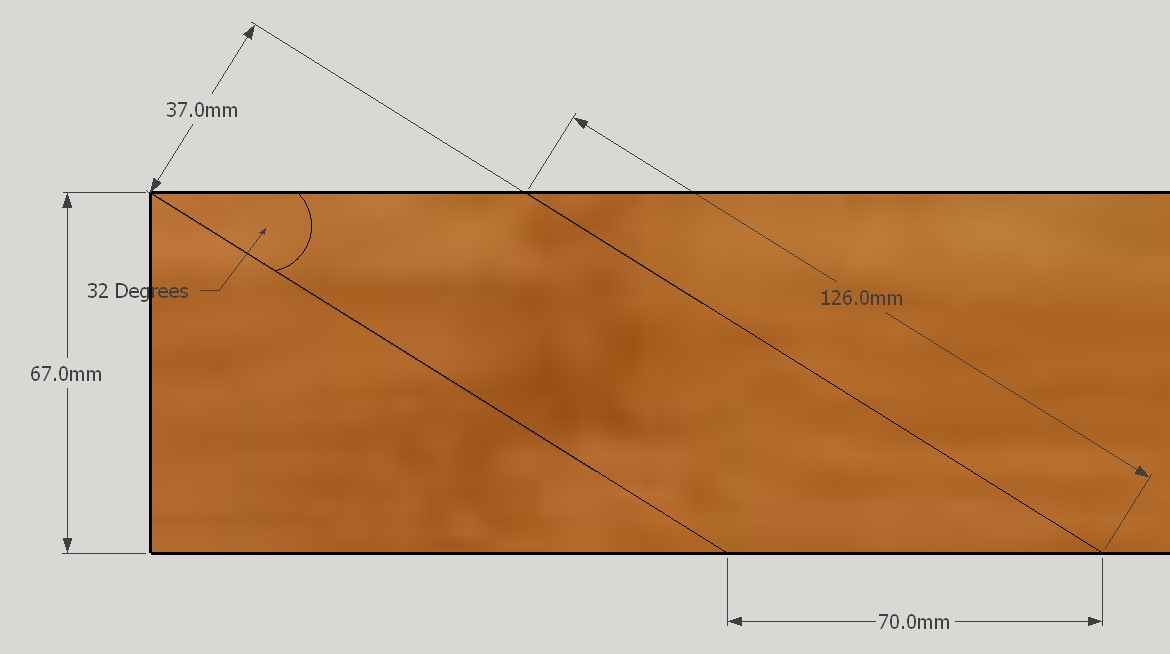
To make the angled pieces, I cut 37mm wide strips from a length of 67mm x 18mm pine on a 32° angle (the tightest angle I could cut on a drop saw) in order to create the appropriate size slots for the rods.
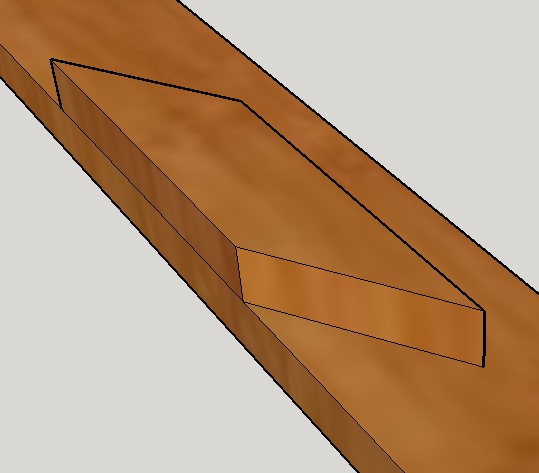
The pieces are then rotated so the long edge is parallel to the long edge of a length of 67mm x 18mm pine (the front leg of the A-frame).*
*Note – Cut all the front legs of the A- frame to the right lengths (2390mm) with the appropriate angles (78.5°) first. Mark out where the base & central cross pieces will sit (refer to Figures 6, 7, 8 & 9) before fixing the angled pieces, including rear 30mm strip.
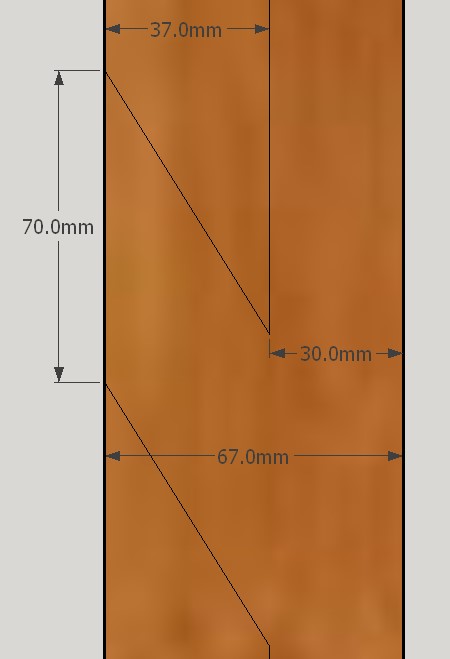
Each piece is then placed at 70mm intervals to create the necessary angled slots to accommodate the rods that hold the rolls.
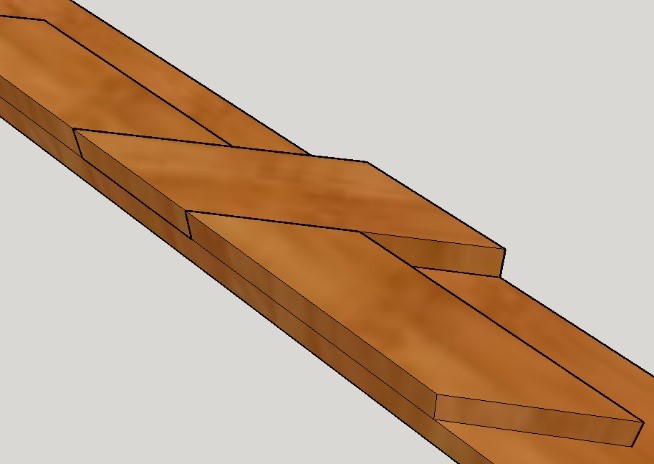
I used one of the pieces left in its original orientation as a template for the spacing.
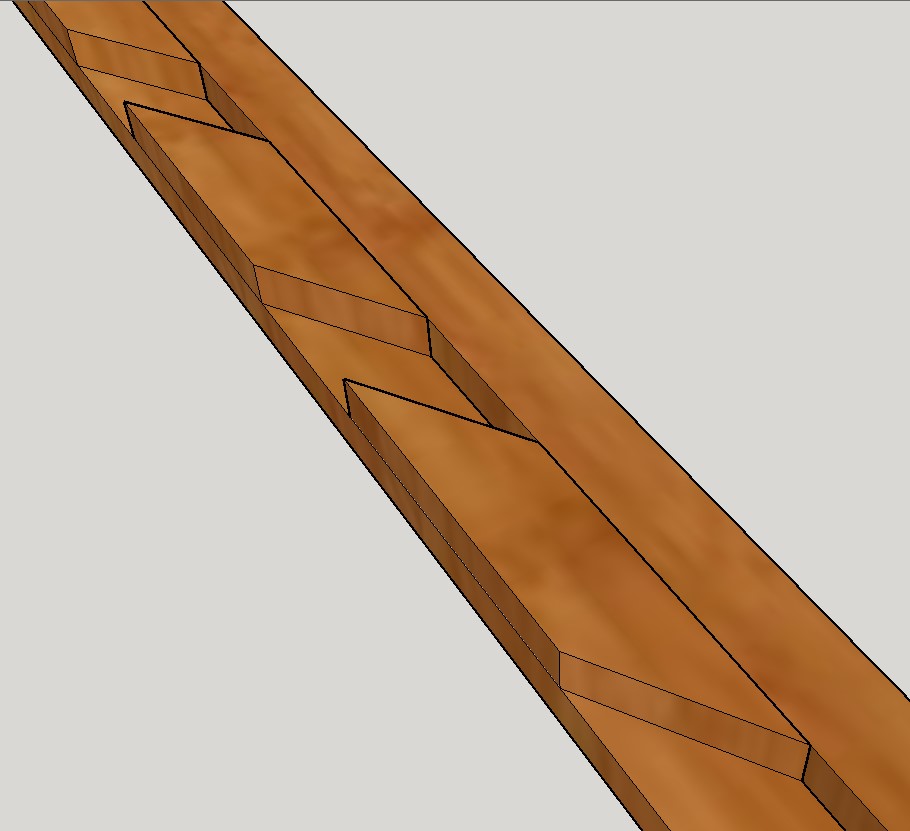
This left a gap of exactly 30mm at the back of the slots, perfectly filled with a strip of 30mm x 18mm pine, which also acts as the ‘back’ of the slot, to stop the rolls falling out.
Once I’d assembled the front legs of the A- frame, I joined them to back legs with the cross braces. I then joined the two A- frames together with the longer rear cross braces.
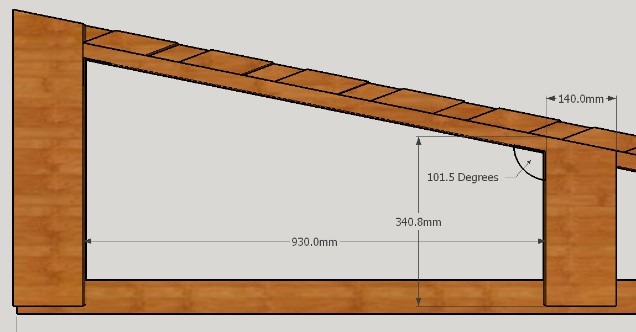
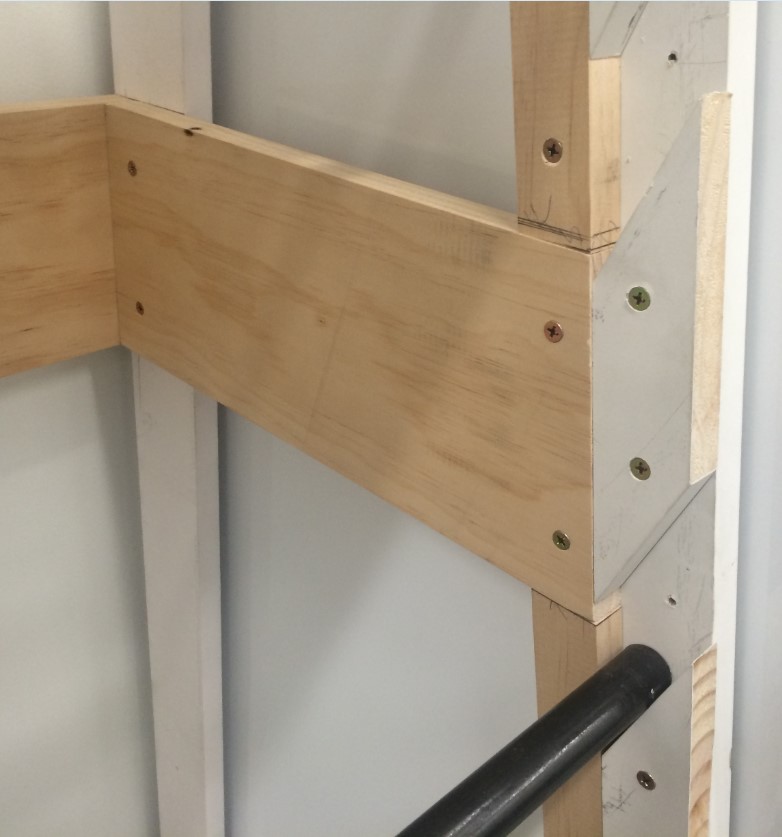
Figures 8 & 9 show how the central crosspiece bisects the 30mm x 18mm strip that sits behind the angled pieces.

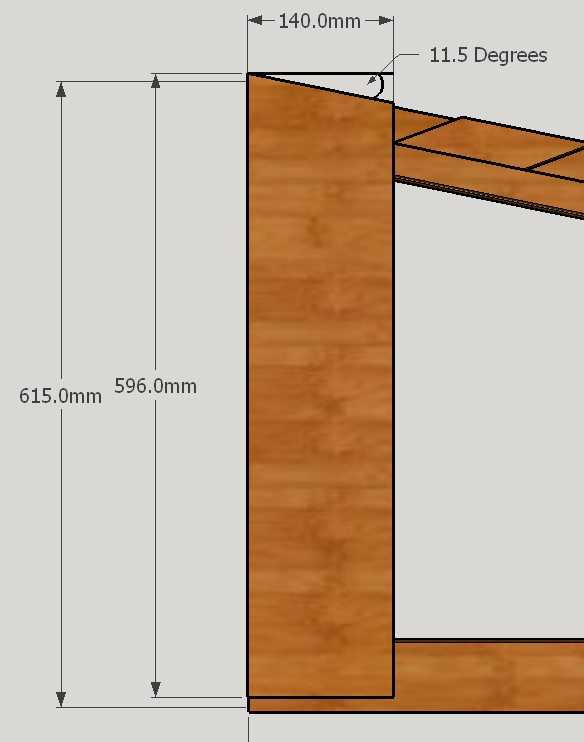
Here you can see how the base crosspiece goes all the way to the front of the “A” frame. The angled pieces and 30mm strip sit on top. Note in the 19mm gap at the back of the cross bar to accommodate the rear cross piece.
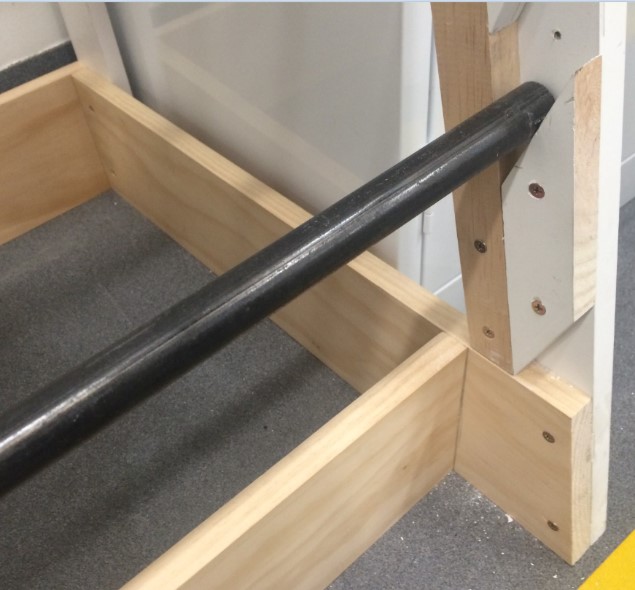
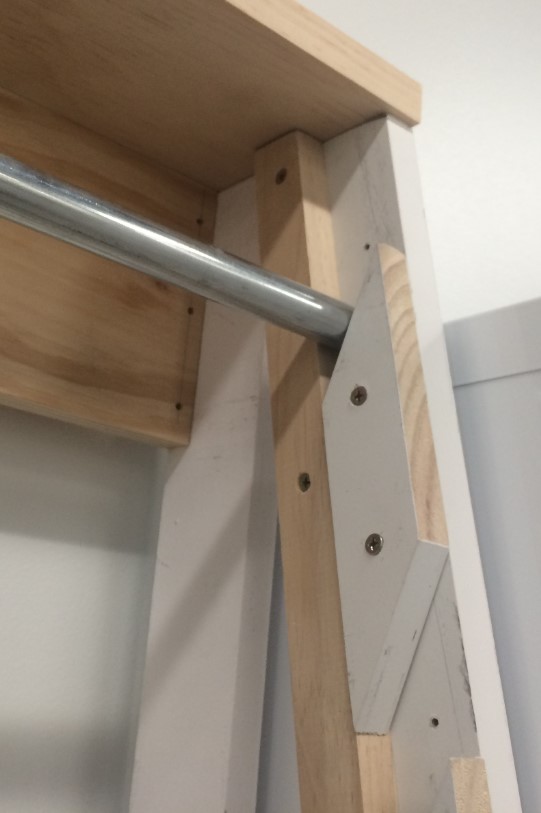
The top crosspiece is almost a perfect fit over the ends of the “A” frame with only a small overhang. The rear vertical cross piece gives strength and stability to the rack. They can also be used to fix the rack to a wall if necessary.
I usually try and place a screw approximately every 100mm which is adequate in most cases. I didn’t bother using glue, mainly because it was not really needed, but also in case I need to pull the rack apart in the future.