This report aims to share an experiment where a reproduction of a 19th century ornate gilt frame was 3D-printed for the Maritime Museum of Tasmania. The experiment was carried out by Artco Services, an art conservation business based in Launceston, Tasmania, in collaboration with Gondwana Studios, also a Launceston-based company specialising in casting scientific replicas of natural history specimens and exhibition fabrication. In 2018 Gondwana Studios purchased five 3D printers and produced its first fully 3D-printed skeleton of a five-metre-long prehistoric crocodile for the Museum and Art Galley of the Northern Territory, currently on display in Alice Springs. After seeing the high quality of the final product, I decided to explore the possibilities of this technique applied to conservation of cultural heritage.
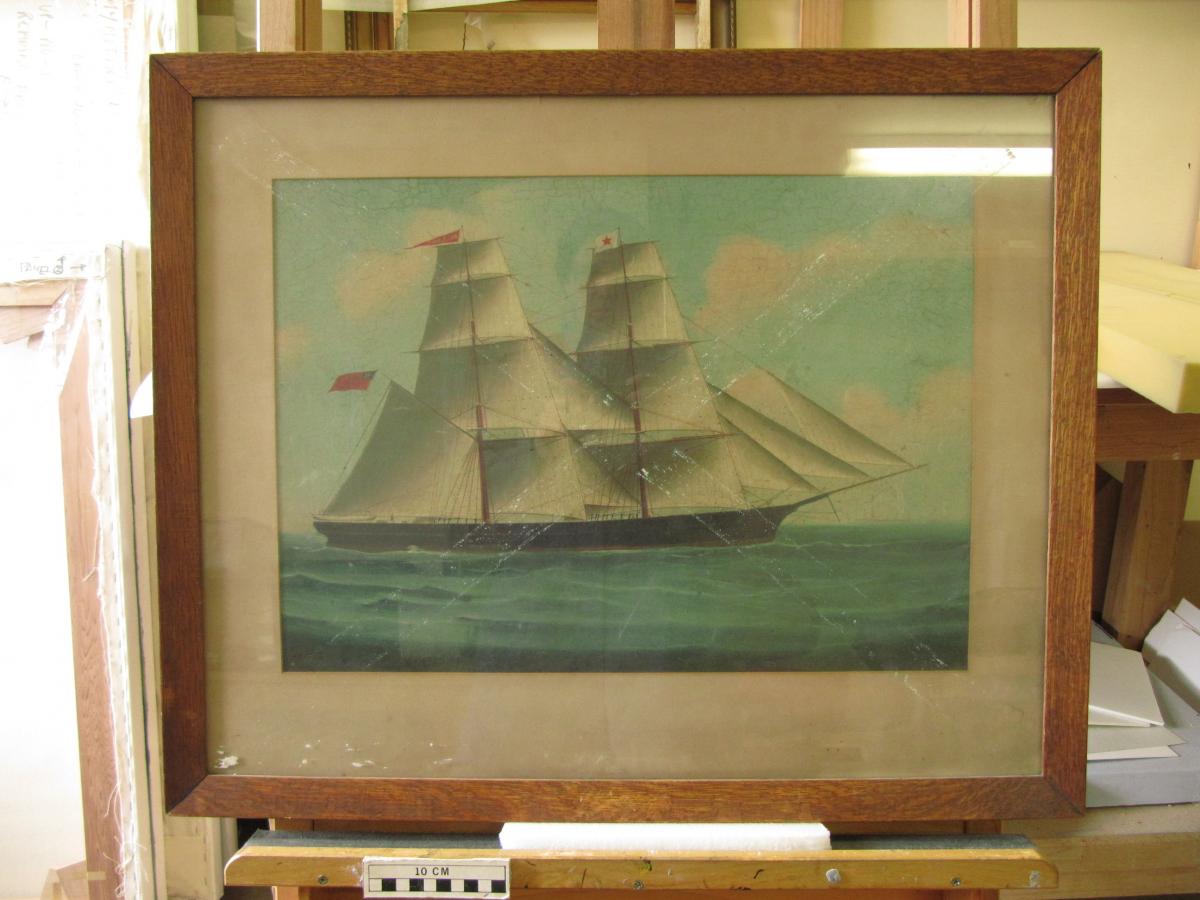
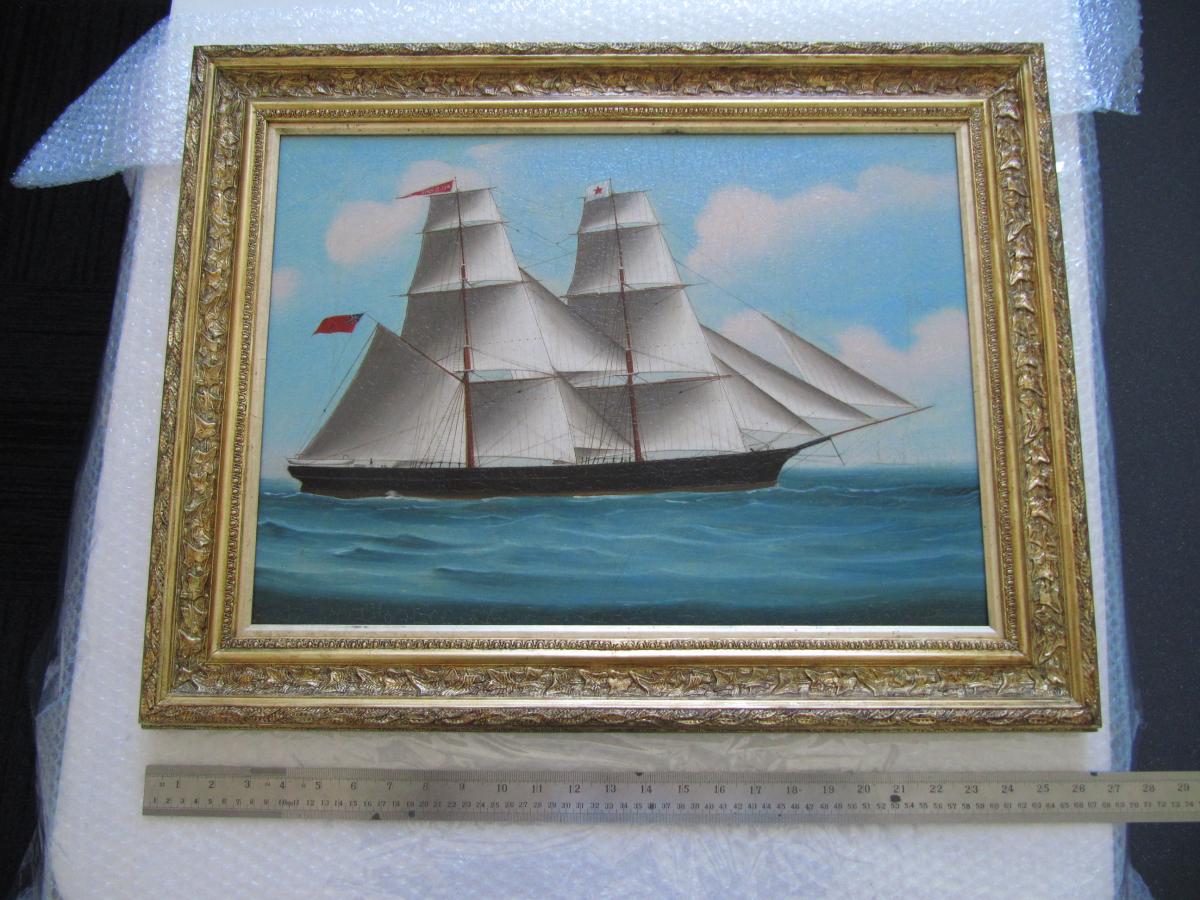
At the time, two 19th century oil paintings from the collection of the Maritime Museum of Tasmania (MMT) were being conserved at Artco Services. ‘Mary Blair’ had its original ornate gilt frame; however, ‘Wild Wave’ had been marouflaged onto a board and framed like a work on paper with a mount and glazed in a plain wooden frame (see above). The MMT wished for ‘Wild Wave’ to be reframed after treatment as an oil painting with a gilt frame. At the time we didn’t have the resources or skills to make a custom-made reproduction frame, so the opportunity came up to try to ‘print’ a copy of the original frame of ‘Mary Blair’ for the painting ‘Wild Wave’. And so the new adventure started…! If there is something I have learnt, it is that 3D printing is incredibly complex and not as easy as pressing the ‘print’ button on a normal printer; it needs a high level of understanding of the printer and the whole process, coupled with good problem-solving skills, patience and determination!3D printing has been widely used in many applications in the field of cultural heritage conservation; examples include printing missing sections of sculptures, reconstructing architectural elements, printing full replicas of artworks, printing mounts or supports for objects on display, etc. In 2015 a full exhibition of artworks 3D printed in low relief was created for blind people at the Prado Museum (Marin Piñero et al. 2017).
However, to our knowledge, 3D printing has never been used to produce custom-made frame reproductions, at least in Australia. In the following sections the process followed to print the frame for ‘Wild Wave’ will be explained.
3D Printing a reproduction frame for ‘Wild Wave’
Stage 1: Scanning the original frame
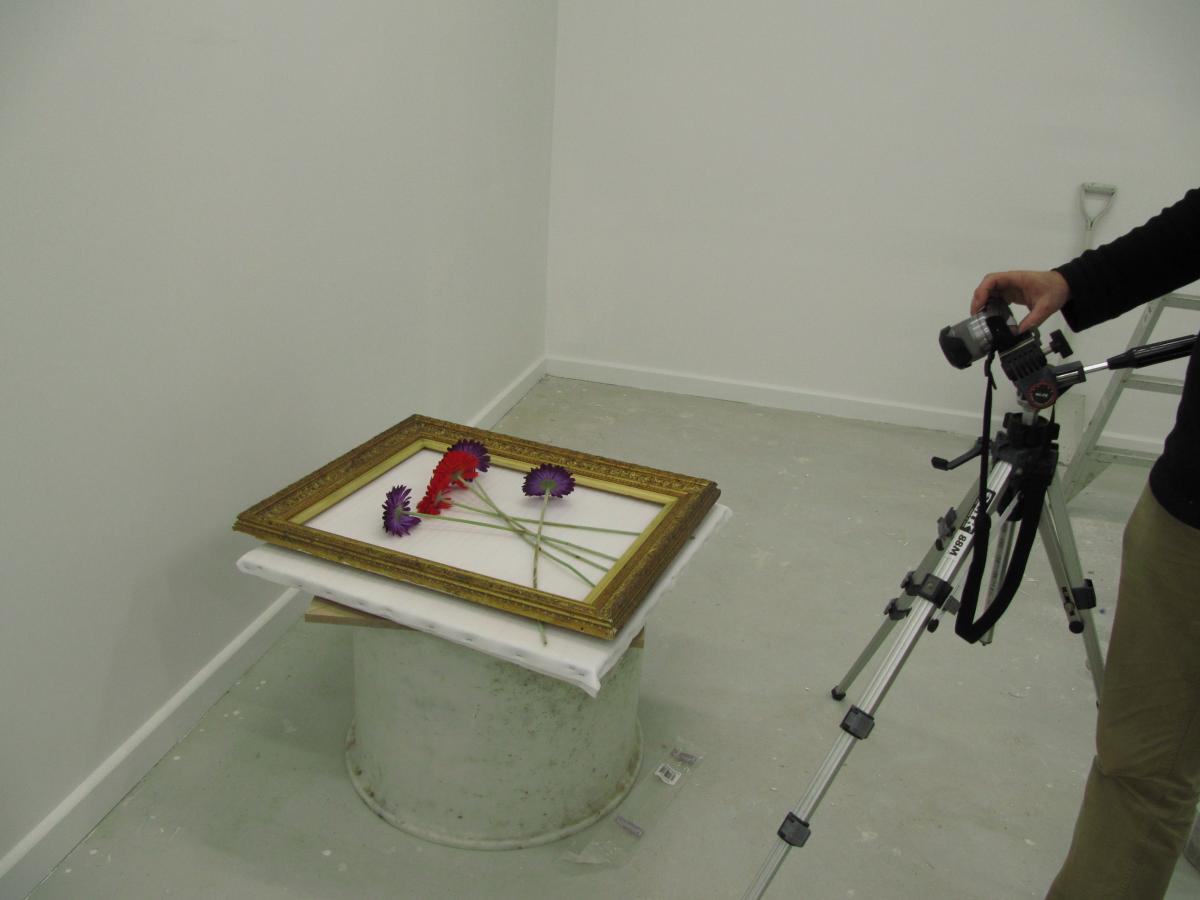
The process of 3D printing starts with scanning or data capture of the object to be copied and printed. This first stage of the process can be done with a scanner; however, even the less sophisticated scanners are very expensive, and a more economical option is to use the method known as ‘photogrammetry’, whereby photographs of an object are taken from different angles and then combined and turned into a 3D mesh by a computer program1. So, the first step of our experiment was to take about 100 photographs of the original frame of ‘Mary Blair’ with a DSLR camera from different angles. This was done by placing the frame on a turntable (see Image 3). After that, the photographs were converted into a 3D digital mesh using the program Agisoft Photoscan Pro. Some of the problems encountered during this process were the reflections from the shiny gilded surface, and the repetitive pattern of the frame, both of which confused the software. This was solved by placing marker points (an object in the middle so that the program can use it as a position reference).
Stage 2: 3D Modelling
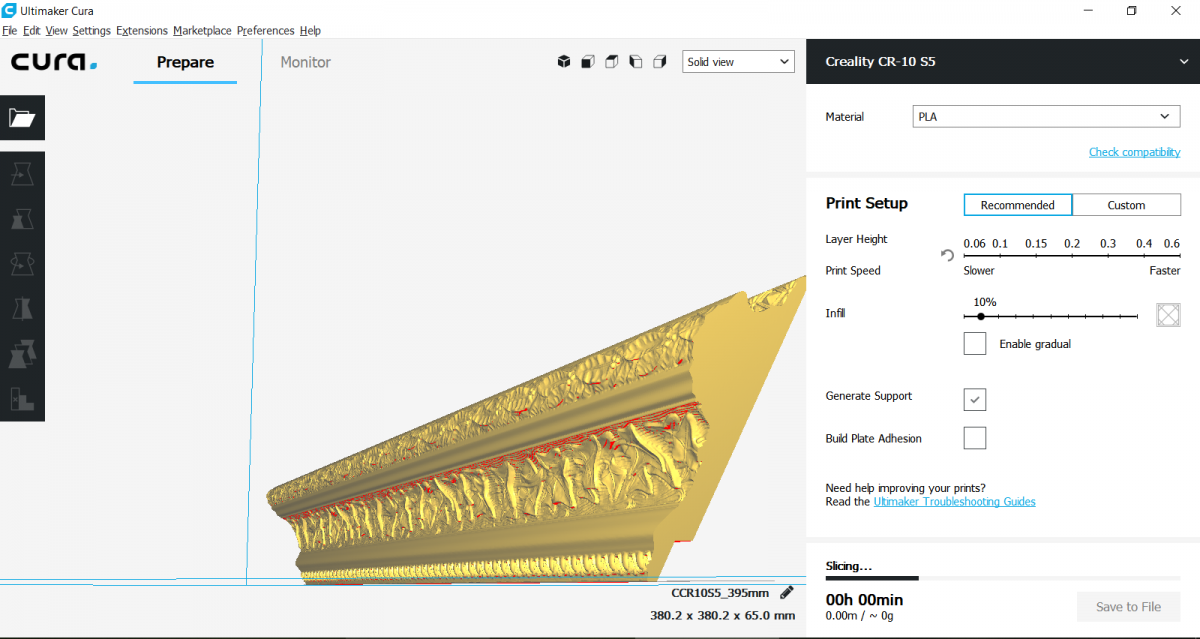
After the data is captured, the 3D mesh of the object can be modified, ‘cleaned’, shrunk or enlarged and cut down to the desired size. This is done using the digital sculpting software ZBrush2. Since the four sides of the frame were the same running ornament, only one side of the frame was used as the 3D model (see Image 4). This was cut down to fit the height and the width of the four sides of the frame, since the painting ‘Wild Wave’ was smaller than ‘Mary Blair’.
If the original frame is damaged, during this step the losses of ornaments can also be digitally modelled and reconstructed.
Stage 3: 3D printing the frame
After the 3D model of the frame is finalised, the next step is the actual printing. The finished file from ZBrush needs to be converted into a G-code file3 to be ready for printing. This was done using Cura software. The printer used was a Fused Deposition Modelling (FDM) type printer4. Before printing, all the settings for the printer need to be chosen. These include the layer height (which will determine the ‘resolution’ of the print), which generally varies from 0.1 mm to 0.3mm with the standard nozzle print of 0.4mm. The higher the resolution, the longer the printing time. Other settings are the bed temperature, the temperature of the nozzle, the speed of the print, the fill density and the shell thickness, just to name a few!
The type of filament also needs to be selected. We decided on PLA (polylactic acid) since it is a biodegradable plastic made mainly from corn starch and it is one of the easiest and most widely used filaments5. Other filaments such as ABS6 (the type of plastic used for making LEGO) are more difficult to use, since they require the use of fume extraction systems and the printers must be enclosed to stop fluctuations in temperature.
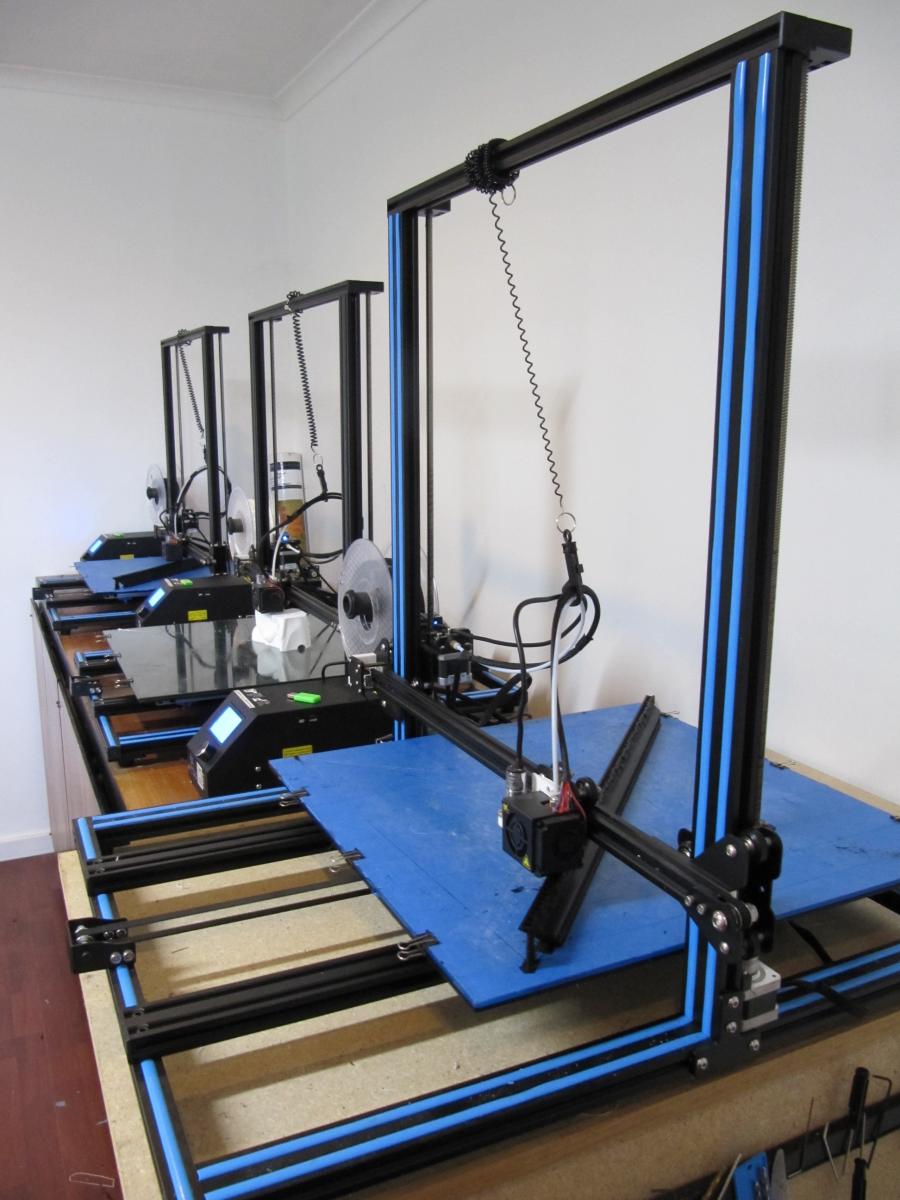
The frame was printed using black PLA filament with a 3D printer Creality CR-10S S5 with 0.1 mm resolution. The frame was printed in six separate sections, with the shorter sides printed in one piece, and the longer sides of the frame printed in two halves each. The total printing time was around 200 hours. When printing, it is important to find the best orientation to minimise the printing lines on the visible surface. The frame was printed with its internal edge facing down on the printing bed. Since the print always starts at the bottom, when printing objects that have overhanging, the printer builds up a sort of ‘scaffolding’ that holds the print material in place. Then the excess can be easily removed once printed. After many trials to get the print right and seeing all the waste product involved, being a very environmentally conscious person I was very glad to be using a biodegradable plastic!
Stage 4: Assembling and priming the frame
After successfully printing the frame, the six pieces had to be joined together. Since the printing size is limited by the physical size of the printer, when printing large objects these can be sliced on the computer software prior to printing, and a system of internal dowels can be created to joint the pieces together, giving them more structural support than if they were just glued together. It is also possible to print holes inside the printed object for an internal support such as a metal rod.
In this case the sides of the frame were joined together with polyester resin. A strip of wood was attached to the reverse of the frame also with polyester resin. This was done to build up the back of the frame, give it more rigidity and provide a material to which the hanging attachments and brackets can easily be screwed.
The frame was then fully coated with a layer of enamel primer filler to seal the PLA plastic and to fill the fine step lines of the printing, applied with a spray gun. A final two layers of black enamel paint were applied to the whole frame with a spray gun, to recreate the colour of black bole.
Stage 5: Gilding
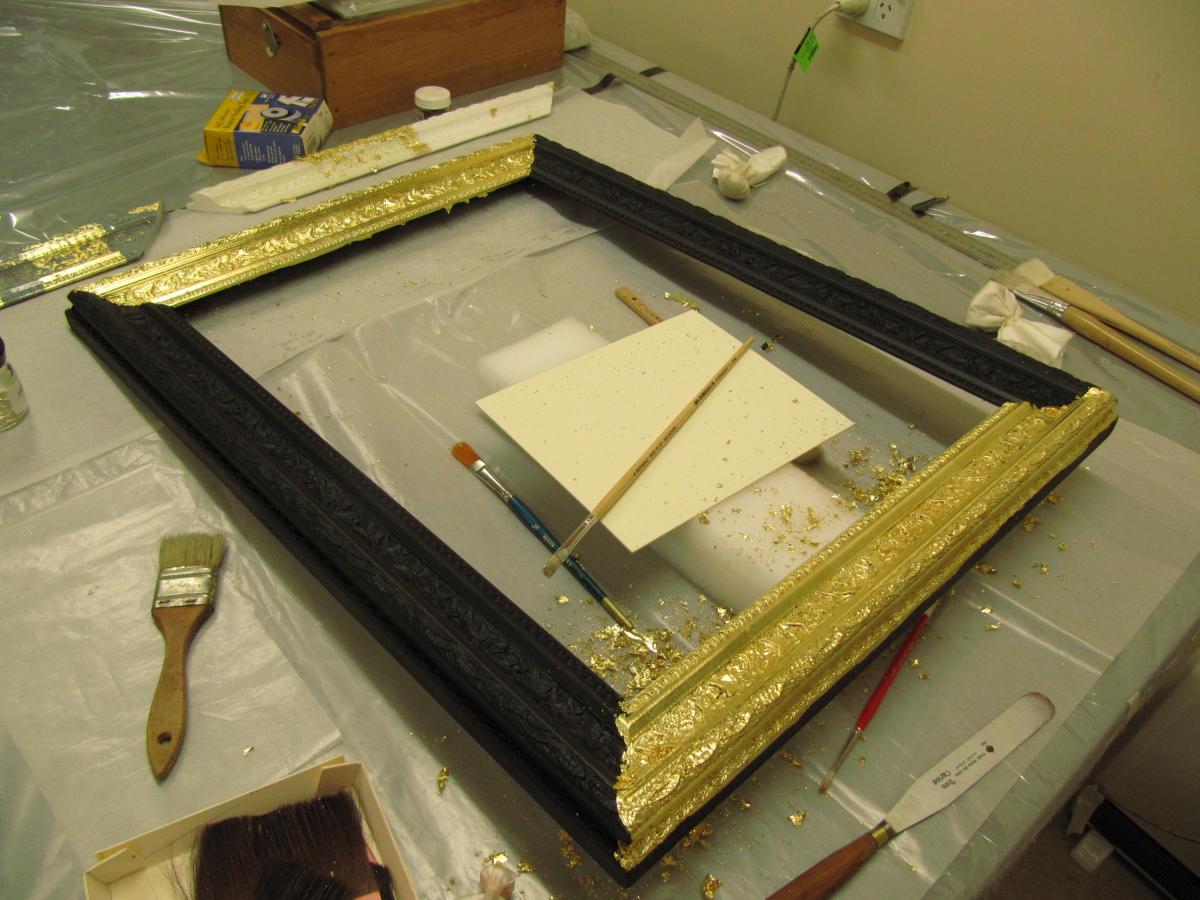
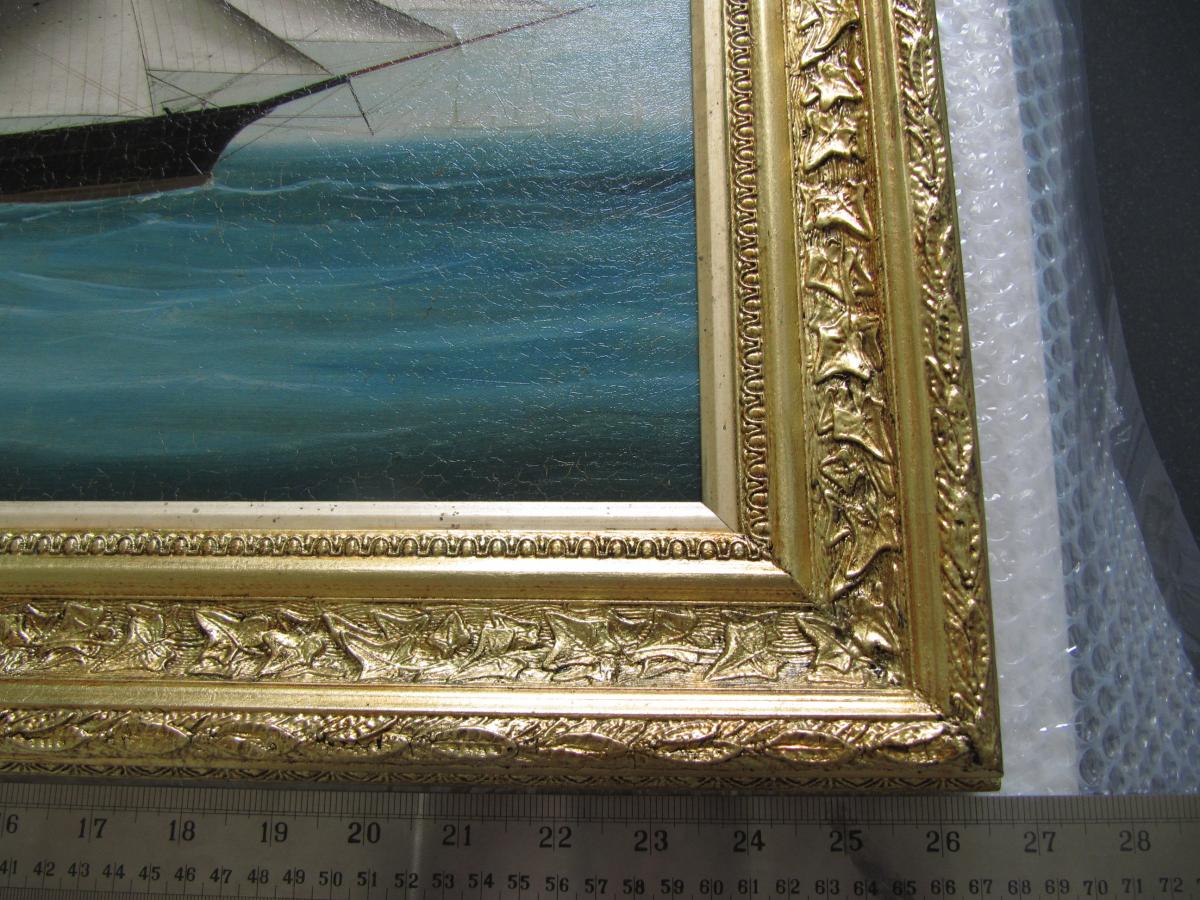
After the printing process was completed, the frame had to be gilded using the usual traditional gilding methods. Various tests were carried out with different sizes to see which one would adhere better to the primed printed surface. In the end an acrylic size was chosen since it gave the best results. The frame was therefore gilded using acrylic size and schlagmetal (see Image 6). A layer of 20% blond shellac in methylated spirits was applied after gilding as an isolation layer. A patina was then applied over the whole frame to make it look aged and similar in tone to the original frame, using watercolours and pigments. A final protective layer of blond shellac was applied to the whole frame as a final protection (see Image 2 and 7).
Stage 6: Rehousing ‘Wild Wave’ into its new frame
When reframing the painting, I was very conscious of the fact that the frame was an experiment and we can’t predict how it is going to age. Therefore, any direct contact of the frame surface with the painting was avoided. An old gilt wooden slip was recycled and added to the frame, and the whole verso of the frame was sealed with grey archival frame sealing tape.
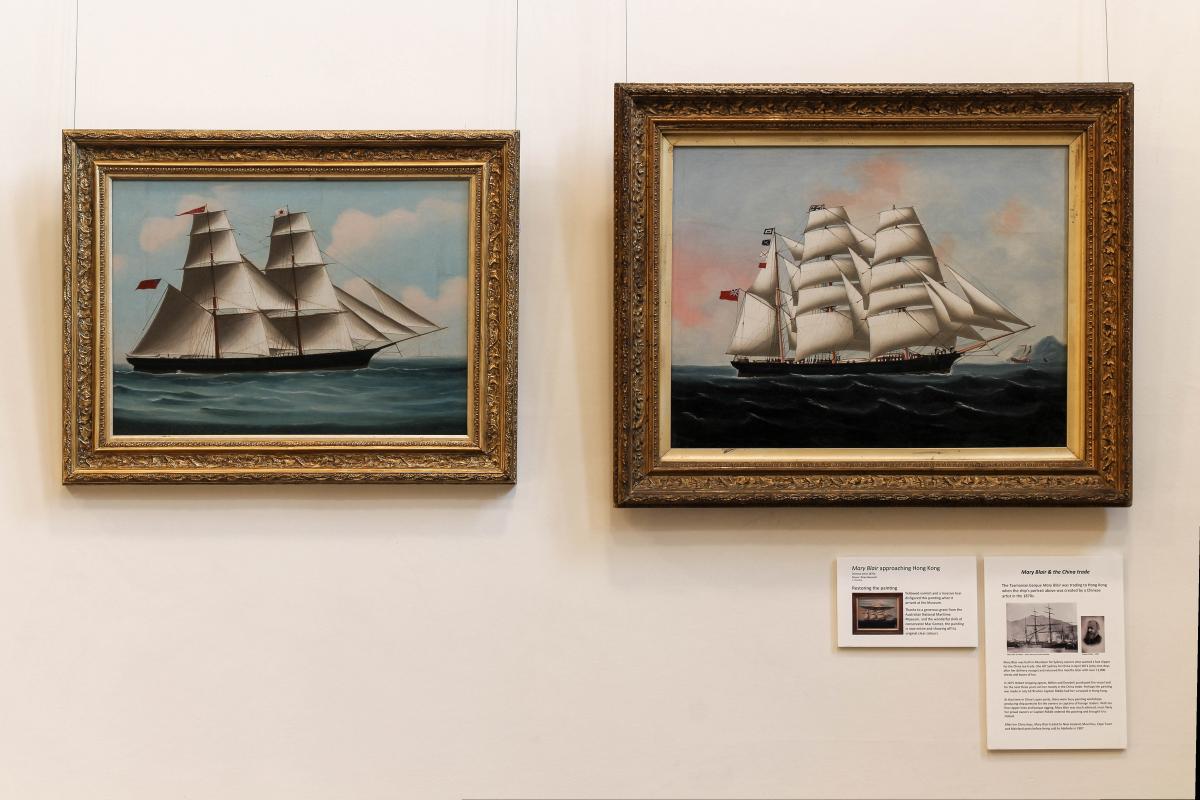
The paintings ‘Mary Blair’ and ‘Wild Wave’ are now hanging together at the Maritime Museum of Tasmania; and having two similar frames makes them look like a pair (see below).
The 3D printed frame will be closely monitored for any changes in its condition.
Evaluation and Further Research
After the success of this experiment, 3D printing has been proven to be a useful toolfor the making of custom-made reproductions of frames. The quality of the final frame was comparable to that of a traditional frame. The only imperfection observed was that in a few of the flat areas printed, when examined closely, a very fine pattern could be seen from the printing, which was accentuated by the shine of the gold. However, this can probably be corrected by more sanding of the primer to make it perfectly smooth before gilding.
While it is not intended that 3D printing could replace the craftsmanship of traditional framemaking, it presents an alternative to institutions and collections without the skills or resources for traditional framemaking, and also presents a new tool for framemakers.
Some of the advantages of 3D printing over traditional framemaking are that, when a replica needs to be made, there is no need to apply silicone or other moulding materials directly over the original frame to be copied, since silicone and other putties can be damaging to fragile gilt surfaces or leave a stain or residue behind. Also, with 3D modelling, a frame ornament or pattern may be enlarged or made smaller to suit the size of the painting. 3D printing can also be used as a step in the process of traditional framemaking: an ornament can be scanned and then a prototype 3D printed, from which a traditional mould can be taken and then used for pressing compo. 3D printing can also be used in frame restoration to print large areas of missing ornaments on a frame.
Finally, although research has been carried out on the aging of PLA in other industries such as studying its thermal degradation and physical aging (Acioli-Moura et al. 2008), more research needs to be done on the aging of PLA within the conservation of cultural materials. Current research points out that the real issue for the PLA is not so much its degradation, but the fact that it can deform at around 30°C7. This should not be a problem for artworks in museum environments; however, places with warm climates should be careful, especially if the load is heavy. In this case, the potential for deformation of a frame in a warm climate was solved by attached the printed ornament to a solid build-up wooden structure.
Further research of interest to the author includes the application of traditional gesso over PLA to allow for water gilding, and doing aging tests with PLA samples gilded with different materials, to see if PLA is more stable than compo or gesso and it doesn’t crack over time. Other filaments such as PETG have been suggested by some conservators8; however, this type of plastic is less environmentally friendly.
We are open for further collaborations with institutions, conservators and framemakers to keep expanding on the possibilities of this technique, undertake further research and do more trials to 3D print frames or other cultural objects.
References
Acioli-Moura R and Sun X S 2008, ‘Thermal degradation and physical aging of poly(lactic acid) and its blends with starch’, Polymer Engineering and Science, Vol. 48 Issue 4, pp. 829–836.
Marin Piñero B, Madrid García J A and Bachiller Martín C 2017, ‘Impresión 3D: aplicaciones al patrimonio’ (3D printing: aplications to heritage), Conservación de Arte Contemporáneo 18ª Jornada, Museo Nacional de Arte Reina Sofía, Spain, pp. 27–37.
Acknowledgements
I would like to thank Rona Hollingsworth, Curator of the TMM, for her enthusiasm and support in letting us experiment with making a frame for their painting, and to the Australian National Maritime Museum for their grant, allowing us to conserve and frame the paintings ‘Mary Blair’ and ‘Wild Wave’. I would also like to thank Jessica Lewinsky, Conservator at the Israel Museum, for sharing her findings and feedback from other conservators on PLA applied to conservation. Finally, many thanks to Peter Norton from Gondwana Studios for making this project possible, and for his endless patience editing the 3D model of the frame and dealing with the multiple trials and errors during the printing process.
Footnotes
1. Photogrammetry is defined as the science of making measurements from photographs. The input to photogrammetry is photographs, and the output is typically a map, a drawing, a measurement, or a 3D model of some real-world object or scene (see www.phtogrammetry.com ).
2. ZBrush is a digital sculpting tool that combines 3D/2.5D modelling, texturing and painting. It uses a proprietary ‘pixol’ technology, which stores lighting, colour, material, and depth information for all objects on the screen (see https://en.wikipedia.org/wiki/ZBrush ).
3. G-code, which has many variants, is the common name for the most widely used numerical control programming language. It is used mainly in computer-aided manufacturing to control automated machine tools (see https://en.wikipedia.org/wiki/G-code ).
4. Fused deposition modelling (FDM) is a 3D printing process that uses a continuous filament of a thermoplastic material. Filament is fed from a large coil through a moving, heated printer extruder head, and is deposited on the growing work (see https://en.wikipedia.org/wiki/Fused_filament_fabrication ).
5. Polylactic acid is a biodegradable and bioactive thermoplastic aliphatic polyester derived from renewable resources, such as corn starch (in the United States and Canada), cassava roots, chips or starch (mostly in Asia), or sugarcane (in the rest of the world). In 2010, PLA had the second highest consumption volume of any bioplastic of the world (seehttps://en.wikipedia.org/wiki/Polylactic_acid ).
6. ABS (Acrylonitrile butadiene styrene) is a common thermoplastic polymer. Its glass transition temperature is approximately 105°C. ABS is amorphous and therefore has no true melting point. ABS is a terpolymer made by polymerising styrene and acrylonitrile in the presence of polybutadiene (see https://en.wikipedia.org/wiki/Acrylonitrile_butadiene_styrene ).
7. Information based on personal correspondence from the author with Jessica Lewinsky, Conservator at the Israel Museum (3 Feb 2019), about the aging of PLA, collected from a query in Conservation Distlist Vol 33 issue 1.
8. Ibid.